
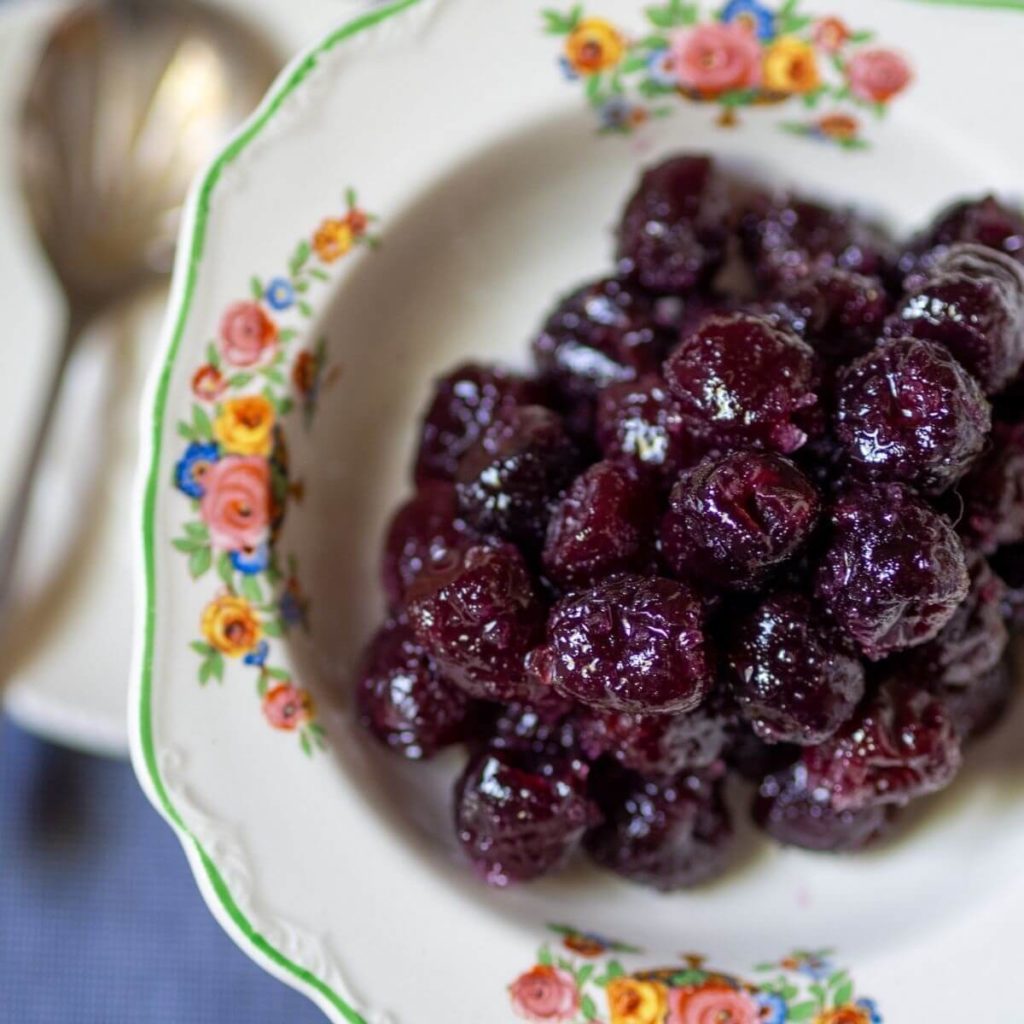
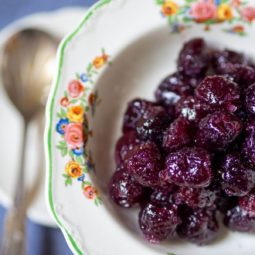
Making glace (candied) cherries is so easy you’ll never use store bought packet cherries again! Make the most of cherry season, especially the end-of-season specials, so you can enjoy cherries in your cooking all-year round.
Glace (Candied) Cherries
Homemade glace cherries have so much more flavour than store bought cherries, which tend to taste and look artificial. Not so for homemade glace cherries!
This recipe is very easy to make. Although it does take 8 days from start to finish. That might sound like a bit of effort but only about 10 minutes is needed each day using this method. I found this recipe really enjoyable to make and next season, I’m going to glace as many cherries as I can – it’s little effort for big reward.
A cherry pitter is a worthwhile investment, especially a cherry pitter that does multiple cherries at once. I have the Oxo Good Grips Pitter ($35). There’s a huge range of products available, starting from just a few dollars so you’ll be able to find one that suits your budget. If you have kids they’ll probably love pitting the cherries for you.
Have a supply of sterilised jars ready to store the cherries in the fridge. They can be stored in the syrup, or freeze the syrup to make glazes, gravies, sauces or add to cooking and baking. Glace cherries should keep in the fridge for up to one year, just when fresh cherries come back into season.
Glace (Candied) Cherries
Equipment
- Large Saucepan
- Heatproof Bowl
- Sieve
Ingredients
- Fresh Cherries
- Sugar minimum 510grams
- Water
Instructions
Day 1
- Pit the cherries, add to the saucepan and cover with water. Cook until barely tender then drain into a heatproof bowl (discard the boiling water).Fresh Cherries
- Make a sugar syrup by combining 180g sugar to 250ml water. You'll need to make enough sugar syrup to completely cover the cherries, so scale up the sugar syrup as required. Bring the sugar syrup to a boil while stirring. Pour over the fruit and allow to stand for 24 hours.Sugar, Water
Day 2
- Drain the syrup into a saucepan and add 60g sugar (increasing proportionately if you made more syrup). Bring to the boil over a low heat and pour over the cherries. Allow to stand for 24 hours.
Day 3
- Drain the syrup into a saucepan and add 60g sugar (increasing proportionately if you made more syrup). Bring to the boil over a low heat and pour over the cherries. Allow to stand for 24 hours.
Day 4
- Drain the syrup into a saucepan and add 60g sugar (increasing proportionately if you made more syrup). Bring to the boil over a low heat and pour over the cherries. Allow to stand for 24 hours.
Day 5
- Drain the syrup into a saucepan and add 60g sugar (increasing proportionately if you made more syrup). Bring to the boil over a low heat and pour over the cherries. Allow to stand for 24 hours.
Day 6
- Drain the syrup into a saucepan and add 90g sugar (increasing proportionately if you made more syrup). Bring to the boil over a low heat then add the cherries to the saucepan and simmer gently for 5 minutes. Return cherries and syrup to heatproof bowl and allow to stand for 2 days.
Day 8
- Drain the syrup into a saucepan and add 90g sugar (increasing proportionately if you made more syrup). Bring to the boil over a low heat then add the cherries to the saucepan and simmer gently for 5 minutes. Return cherries and syrup to heatproof bowl and allow to stand for 2 days. Drain off the sugar syrup and set aside.
- Place the cherries on a lined dehydrator tray or foiled lined oven tray. Place in dehydrator or very low oven (maximum of 100°C) until glace texture achieved (a few hours).
- Store cherries in a jar in the fridge with or without syrup for up to one year.
Notes
Please let me know if it turned out for you! Leave a comment below and tag @modernveganguide on Instagram and hashtag it #modernveganguide