Making vegan food wraps is easy, low-cost and you’ll likely already have two of the three items needed. The third is easy and cost-effective to source.
In recent years beeswax food wraps have become incredibly popular. They’re found at markets and retailers alike, reflecting the growing trend to move away from plastic and single-use wrap for saving food. What is somewhat less-known is that beeswax wraps are not vegan-friendly.
The generally held vegan view on beeswax is that it is exploitative of bees to produce this for commercial purposes. This is because to obtain the wax, honeycomb and honey must be removed from the hive, depriving bees of their energy source and storage space. The great news is that there are vegan-friendly options to make food wraps by substituting beeswax with Candelilla wax.
What is Candelilla Wax?
Candelilla wax is plant-based wax that’s a suitable vegan alternative to beeswax. It’s derived from the Candelilla shrub, which is native to the Chihuahuan desert regions of Mexico and the southwest United States.
The wax can be used in many of the same applications as beeswax. Think candles, beauty products such as lipstick, lip balm, and lotion. It has other uses, such as a binding agent for chewing gum!
After reading about Candelilla wax, I was more than happy to use this for making vegan food wraps.

How to make vegan food wraps
Making food wraps is so easy, I’m a little annoyed that I’ve previously paid ridiculous amounts of money to buy them. Live and learn, huh?
Supplies you’ll need to make vegan food wraps:
- 100% Cotton fabric in suitable quantity for the number of food wraps required
- Baking Paper or brown paper
- Candelilla Wax (a few tablespoons goes a long way)
- Pinking Shears or Scissors
- Iron and Ironing Board
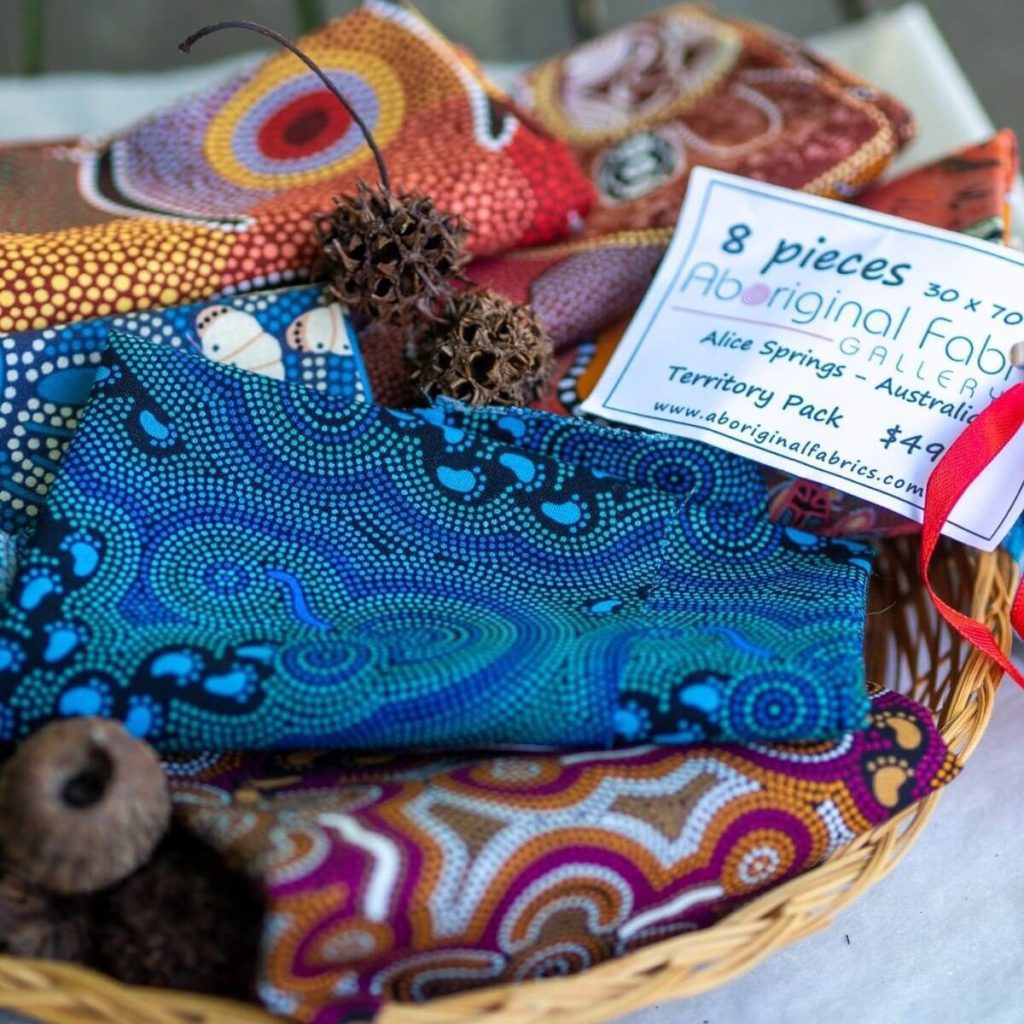
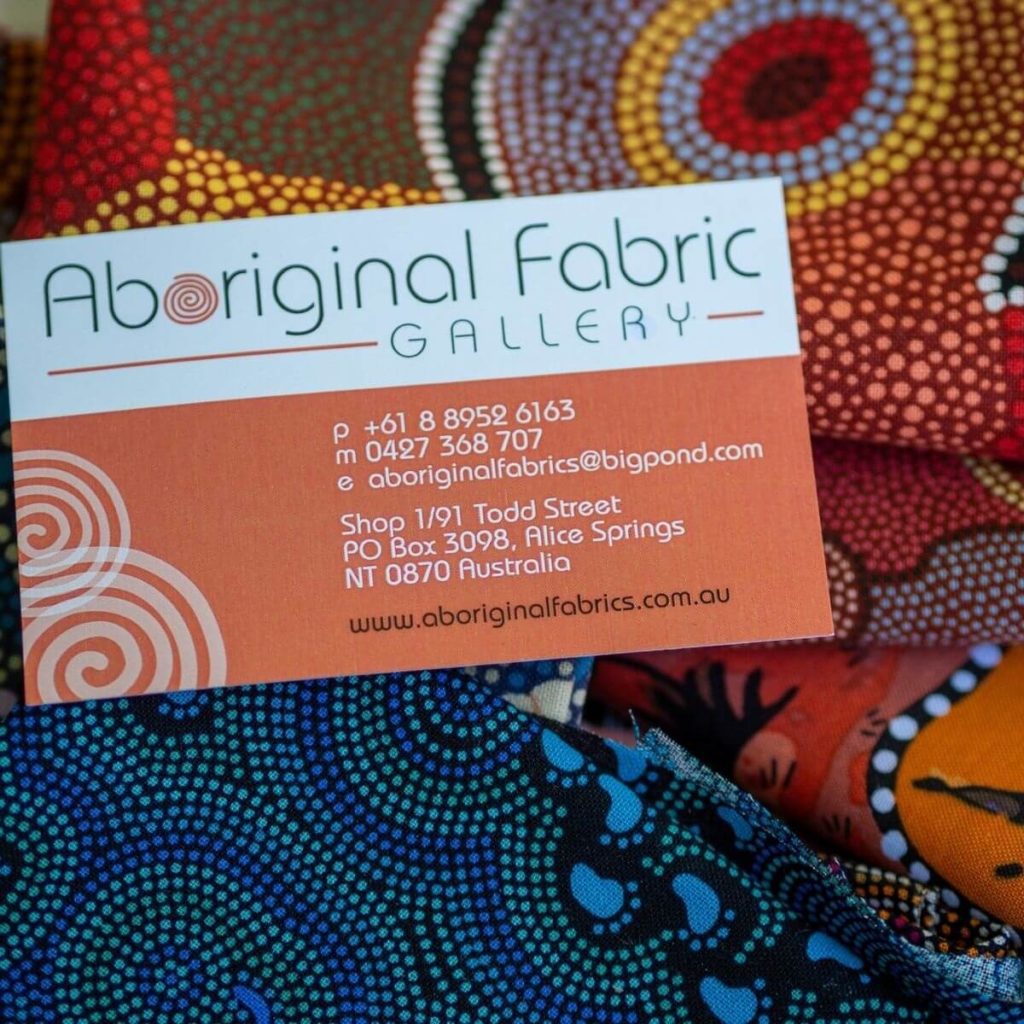
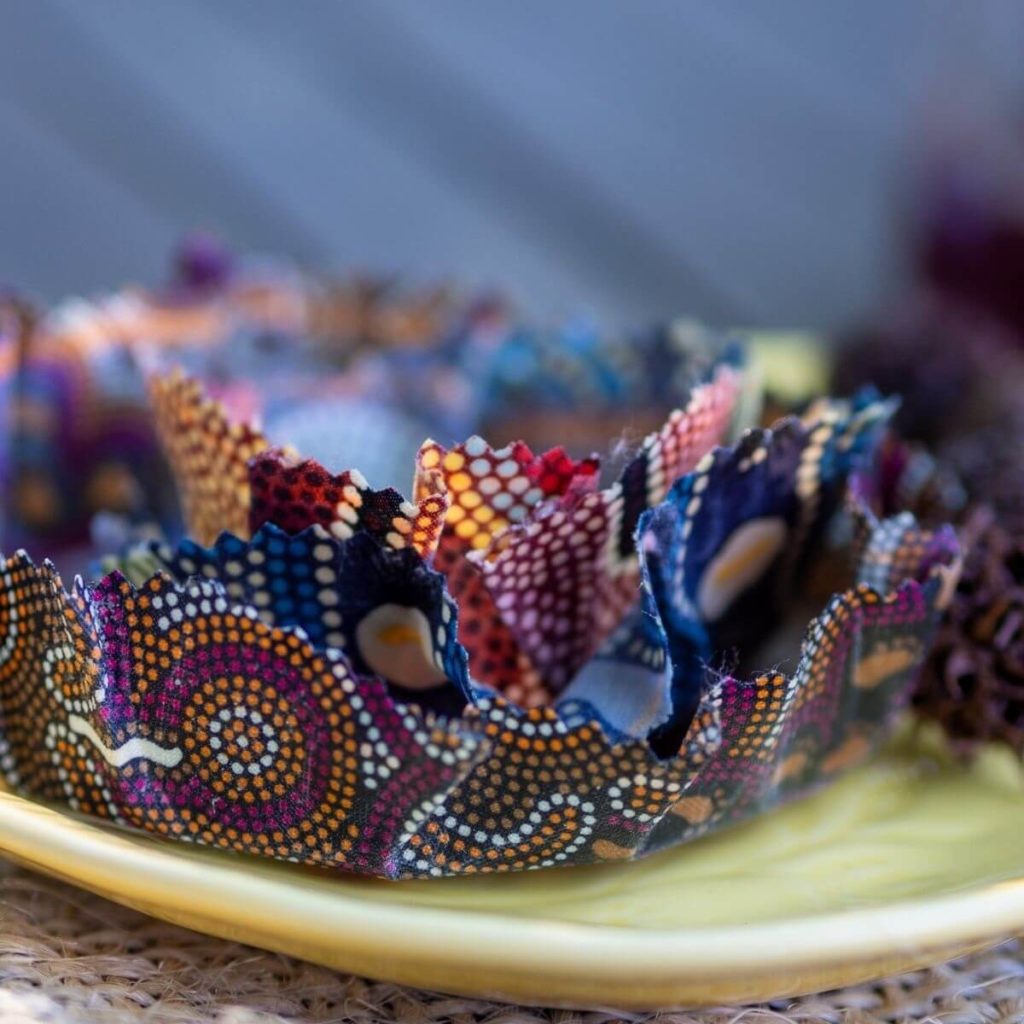
Last year I bought some stunning fabric from the Aboriginal Fabric Gallery. The ‘Territory Pack’ resonated with me because of my childhood growing up in the Territory. The pack includes 8 pieces in the designs Mens’ Ceremony Red, Heart of My People, Bambillah, Womens’ Corroboree, Bush Tucker Blue, Bush Fruit Dreaming, On Walkabout Brown, and On Walkabout Blue. I’m currently using the fabric for my vegan food wraps and to wrap my preserves when gifting.
Baking paper is rarely used in our home but it’s always recycled and repurposed when it is. I think I’ve had the same roll of baking paper for a couple of years now. Brown paper bread bags or sandwich bags would be suitable to use as well.
Candelilla Wax is easy to find online in varying quantities. At the time of my purchase, eBay offered the most economical cost and packaging option. Shop around to find a supplier and price that suits you as there are plenty of options available.
I’m also very lucky that my wonderful and much-loved Mother-in-Law gifted me her pinking shears that are many decades old. Like all things from my in-laws, they are absolutely perfect condition and working order. I feel very lucky to have these. Using the pinking shears from my Mother-in-Law with fabrics from Country offers a beautiful synergy between my childhood and adulthood. Naturally, if you don’t have pinking shears, scissors will work just fine!
Steps to make vegan food wraps
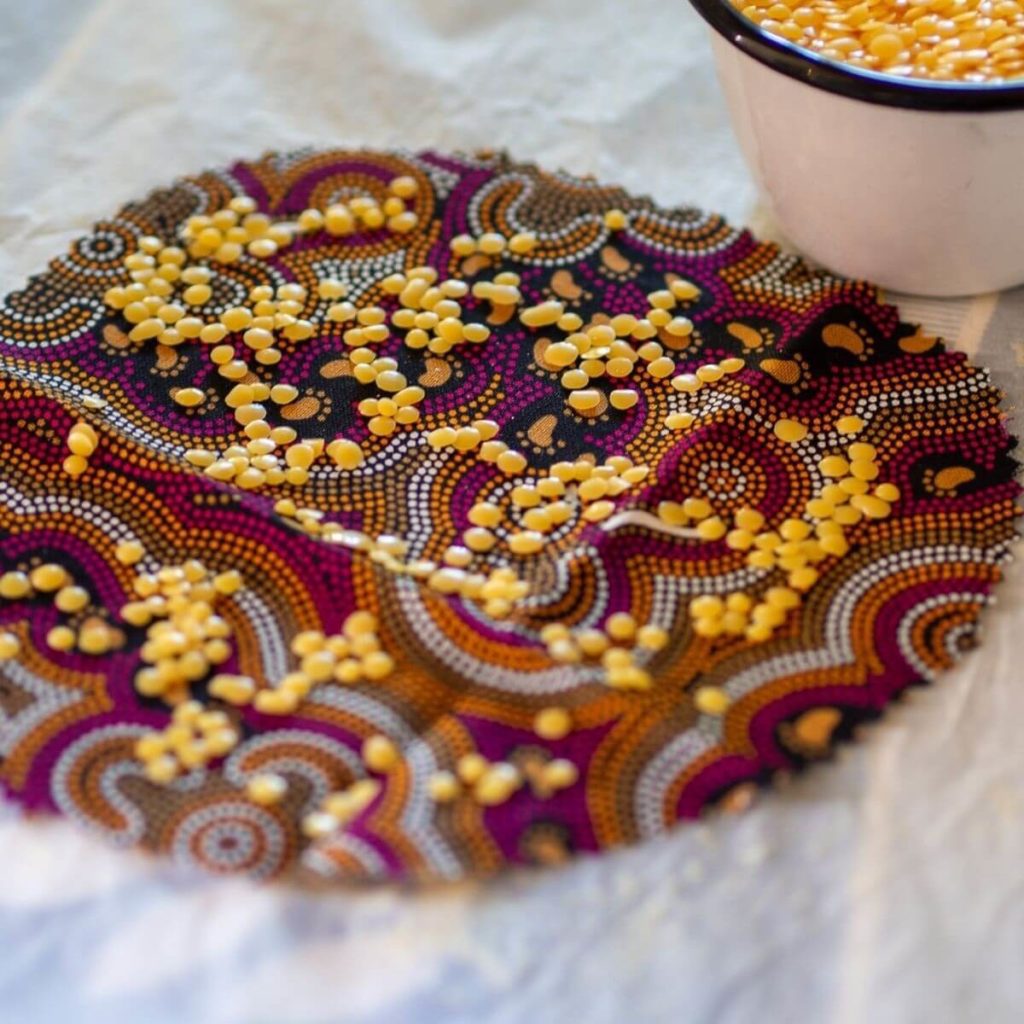
- Using the pinking shears or scissors cut the fabric in assorted sizes and shapes to suit. I mostly use round containers, so used a bowl and jars to trace circles on the back of the fabric prior to cutting. Allow a good 5 – 10 centimetres extra for overhang and to create a seal over the storage container.
- Cut two sheets of baking or brown paper. One piece needs to be bigger than your largest piece of fabric to ensure no wax will run onto the ironing board cover or the base of the iron.
- Place the large piece of paper on the iron board, then put the first piece of fabric on top.
- Scatter the fabric lightly in the centre of the fabric with wax. The wax will spread as it heats so avoid putting wax close to the edges.
- Cover the fabric with the second piece of paper and press down the iron (low heat). The wax should melt reasonably quickly and spread across the fabric. CAUTION: the wax will get hot, so take care not to burn yourself.
- Remove the top layer of paper to check the wax has fully covered the fabric. Add wax to any dry spots, cover with paper and melt with the iron as required.
- Hang the wraps on the line to dry. The wraps will dry very quickly in warm weather, I didn’t even need to hang on the line to dry!
- Repeat with each piece of fabric until your set of vegan food wraps is complete.
How to use, clean and store vegan food wraps
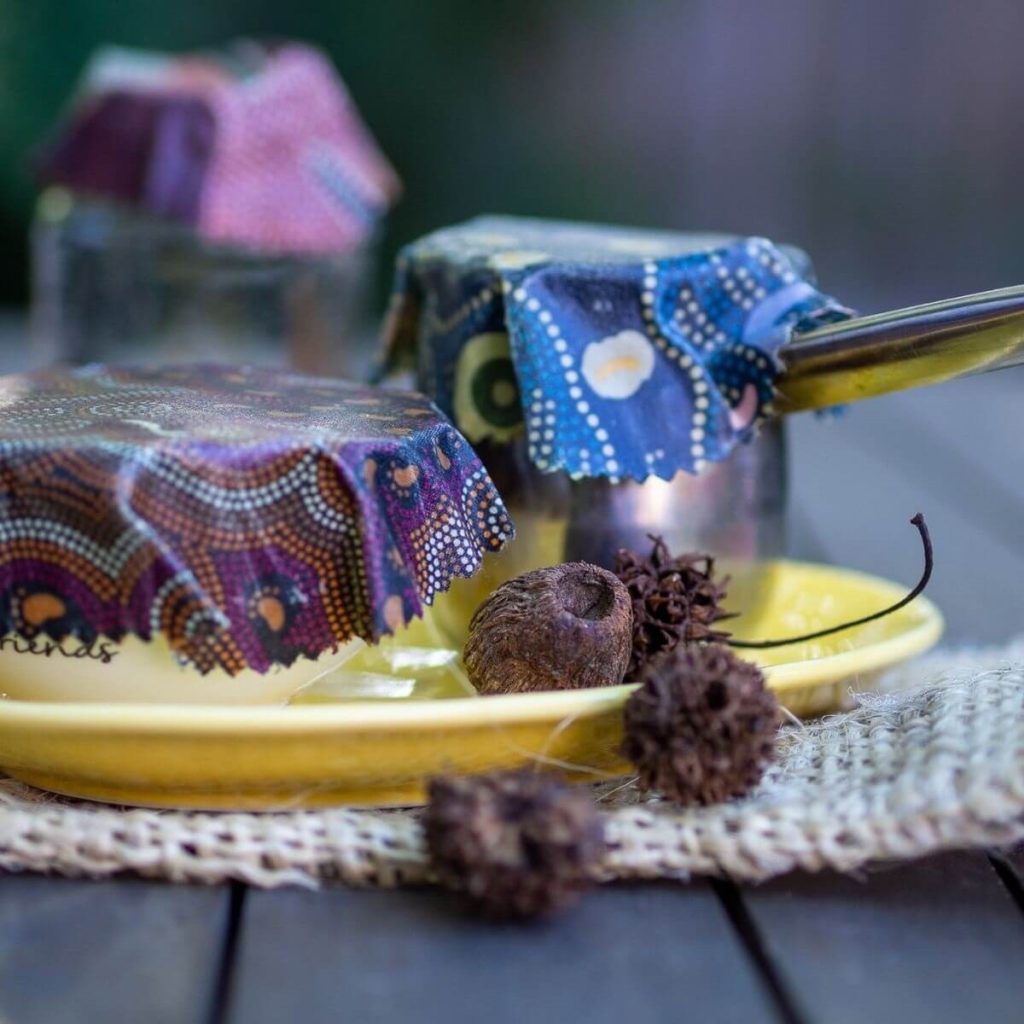
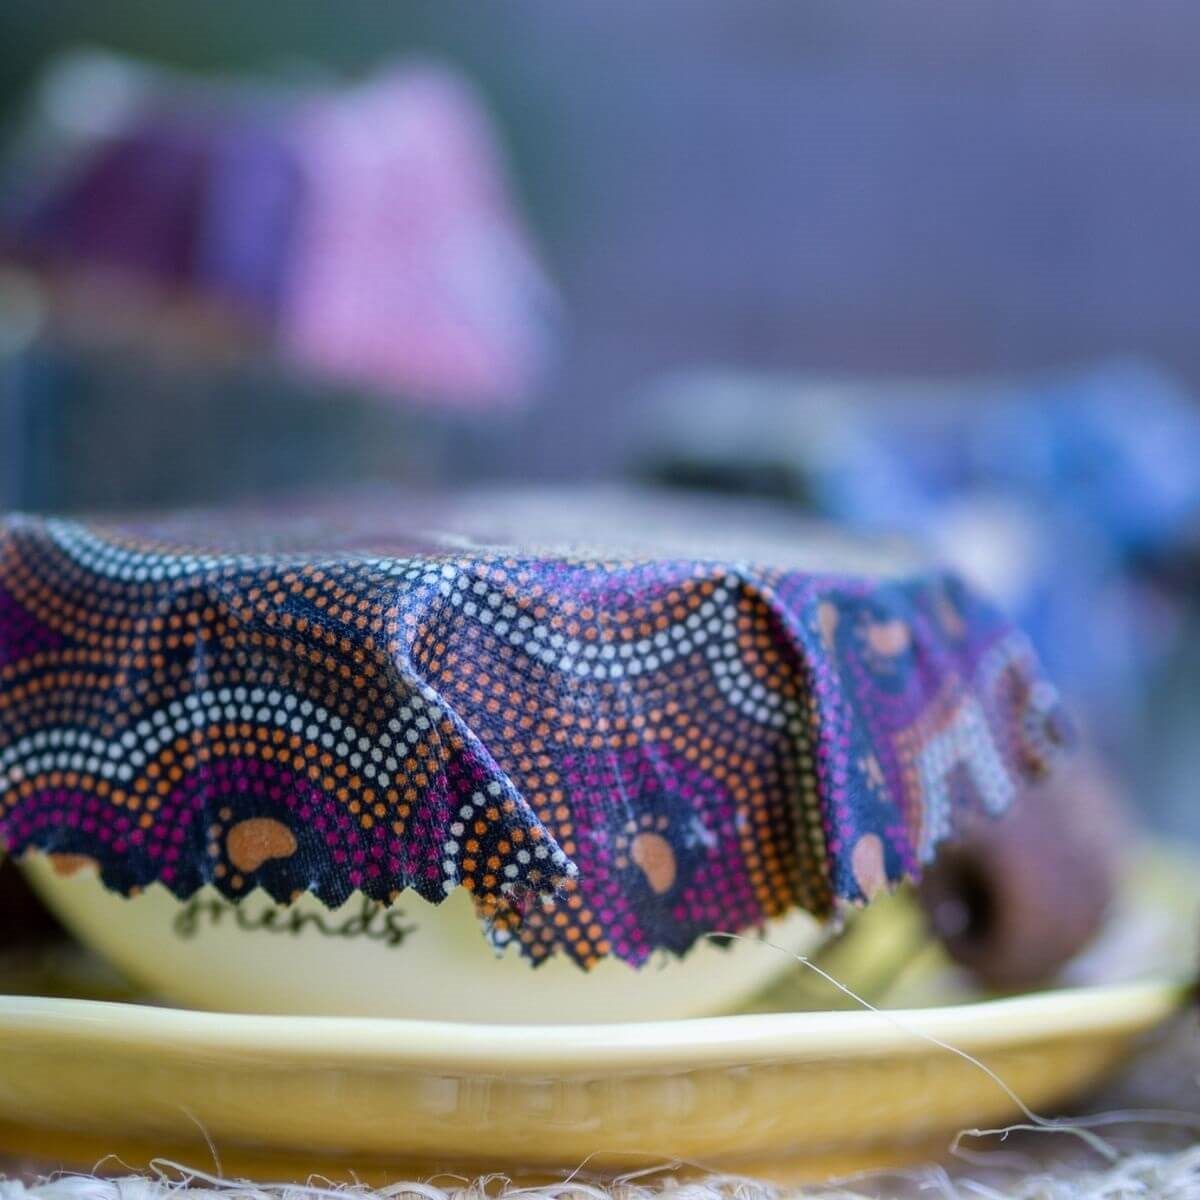
Use the warmth of your hands to gently warm the wax on the wraps as you press over your container. The stiffness of the wax fabric will soften and shape around the container.
Wraps can be washed gently in warm water as required. If possible, store the wraps flat to avoid creasing and cracking the wax. As the wax reduces over time simply wash the wrap and add new wax using the process above.